
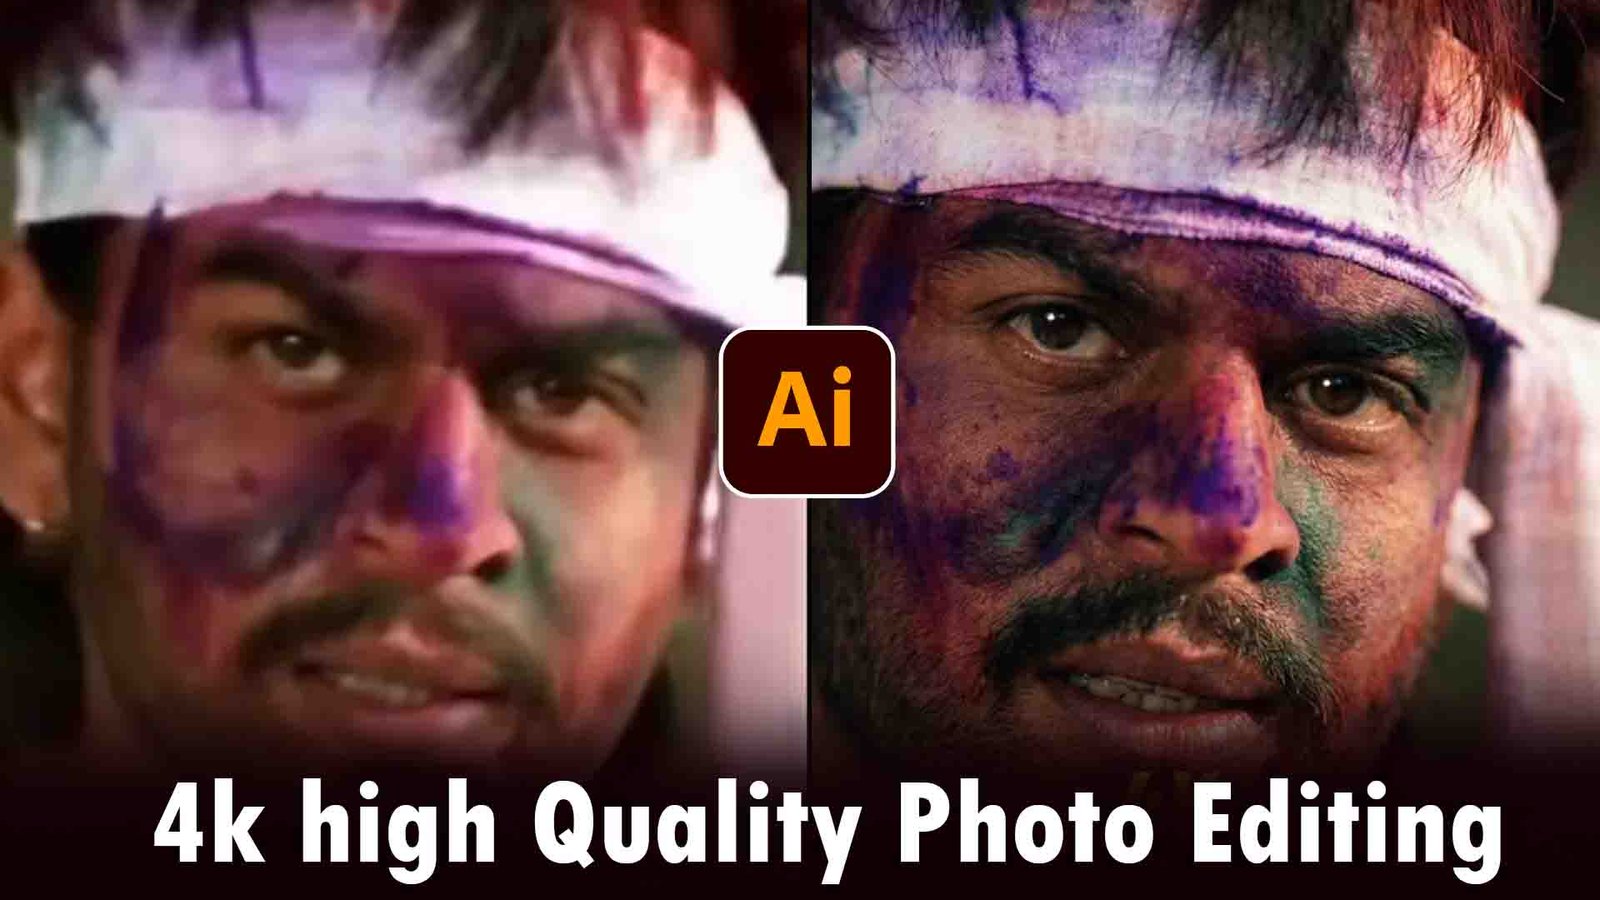
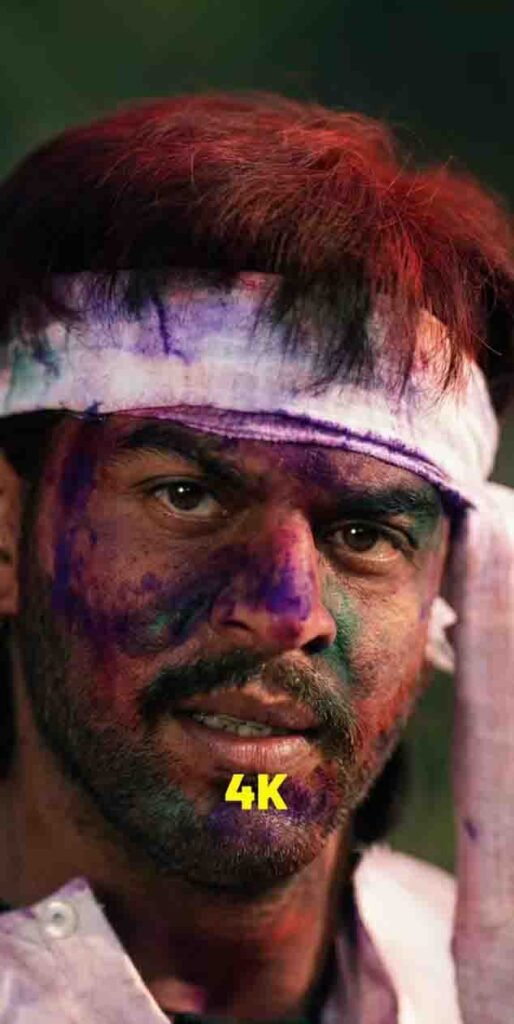
High Quality Photo Editing Prompt 2026 :- Friends, if you also have a blur or low-quality photo and you want to convert it into high quality, then with the help of a single prompt you can very easily convert your low-quality photo into high quality. Because nowadays high-quality photos go viral very quickly and also look very attractive.
So in today’s article, I will give you a prompt to edit high-quality photos and also explain step by step in full detail how to use it. So if you also want to learn and convert your low-quality photo into high quality, then make sure to read the article till the end.
What Is High Quality Photo Editing ?
Friends, this is a type of photo editing in which you write text instructions to the AI explaining what changes you want in your photo and what you do not want to change. You can tell it how much to enhance the quality of your photo, how the face structure should look, and by using these prompts you can create a completely high-quality photo in any AI tool. You just need to upload your blur photo and paste the prompt to create the photo, and your photo will become high quality.
You can use this prompt in different AI tools such as:
- Google Gemini
- ChatGPT
- Grok Ai
How To Use High Quality Photo Editing Prompt
Friends, if you do not know how to use these prompts, then you can easily learn by following the simple steps given below:
- First of all, open Google Gemini or ChatGPT or whichever AI website or application you like, and create an account by entering your Gmail.
- After creating the account, upload any photo that is low quality or blur.
Now just paste this prompt there and click send.- Then wait for a short time until the photo is being created.
- After a little while, your photo will be converted into high quality and will appear there.
- Then you can click on download and save it to your gallery.
Prompt
Enhance the image to ultra-high definition with maximum clarity and realistic detail.
Remove blur, noise, grain, color fading, and compression artifacts while preserving the subject’s exact identity, proportions, and natural appearance. Restore sharp focus with refined micro-details in skin, hair strands, fabric texture, and background surfaces.
Maintain authentic skin texture with natural pores and tonal variation, avoiding over-smoothing, artificial sharpening halos, or plastic effects.
Correct color balance to restore natural skin tones and accurate hues while preserving the original mood. Improve exposure, dynamic range, and contrast subtly to add depth and realism without altering the lighting direction.
Retain the original framing, composition, camera angle, posture, facial expression, background elements, and overall atmosphere.
Hard rule: Do not modify facial structure, facial features, expression, hairstyle, body shape, pose, clothing, age, or identity in any way. The face must remain exactly the same as the original image, only clearer, sharper, and more detailed.
Best Tips for High Quality Result 2026
Friends, to get good results, you need to use a proper photo. That means you should upload a face photo that is slightly better in quality, where the face is properly visible and the background does not have too many objects. Keep the background completely simple and do not make too many changes in the prompt. By keeping these things in mind, if you upgrade your photo, you will get better results.
What are the benefits of high quality editing?
There are many benefits of high-quality photo editing, such as high engagement on Instagram, Facebook, or any social media platform. If you use it for your profile, it looks perfect. Brand collaboration chances increase, and the photo looks premium and attractive.
Nowadays competition on Instagram is very high, so if you want professional and high-quality results, then these 2026 prompts can prove to be the best option for you.
By using these prompts, you can convert your normal photo into a DSLR-level photo.
Last Word
Friends, I hope you have understood everything about how you can convert your photo into high quality by using these prompts. If you still face any problem, then try 2–3 more times and your correct photo will be created. That’s all for today’s article. We will meet again in the next article. If you liked this article, then please share it with your friends.